Preparing your home for a photo shoot can be both exciting and nerve-wracking. Whether you’re capturing images to sell your property, showcase your interior design skills, or just preserve memories, making sure your home looks its best is essential. A well-prepared home not only enhances the final images but also tells a story about the space. Let’s dive into some top tips to get your home photo-ready.
Understanding the Purpose of the Photo Shoot
Before diving into the specifics of home preparation, it’s crucial to understand the purpose behind the photo shoot. Are you staging your home for real estate photos, capturing images for an interior design portfolio, or documenting a special event? Each purpose may require different preparations.
For real estate, the focus is on creating a clean, spacious, and inviting atmosphere that appeals to potential buyers. The aim is to showcase the home’s features, such as natural light, room size, and unique architectural details. On the other hand, an interior design shoot might emphasize style, décor, and layout, requiring attention to every decorative element.
Knowing the goal will guide your decisions about staging, lighting, and which areas of your home to focus on.
Decluttering for a Clean and Spacious Look
One of the most important steps in preparing your home for a photo shoot is decluttering. A clutter-free space appears larger, cleaner, and more inviting in photos. Begin by removing unnecessary items from countertops, tables, and shelves. Consider storing personal items like family photos, toiletries, and excessive décor that might distract from the home’s features.
Focus on creating open spaces that allow the eye to flow naturally through the room. For instance, in a living room, minimize the number of cushions on the sofa, clear off the coffee table, and ensure the bookshelves aren’t overcrowded. In kitchens, clear countertops as much as possible, leaving only a few stylish appliances or a bowl of fresh fruit to add a touch of warmth.
Decluttering not only makes your home look better in photos but also helps potential buyers or viewers imagine themselves in the space, which is crucial for real estate photography.
The Importance of Cleaning: A Sparkling Home Shines
Once you’ve decluttered, the next step is to deep clean your home. A clean home is essential for a successful photo shoot, as the camera can pick up details that might not be as noticeable in person. Dust, dirt, and smudges can become glaringly obvious in high-resolution images.
Start with the basics: dust all surfaces, vacuum carpets, and mop floors. Pay special attention to areas that are often overlooked, such as baseboards, windows, and light fixtures. In the kitchen, ensure that appliances are spotless and that the sink and countertops are free of water spots and stains. Bathrooms should sparkle, with mirrors wiped clean, and all fixtures polished.
Remember, natural light will highlight both the beauty and the flaws of your home, so thorough cleaning is essential to ensure everything looks its best.
Maximizing Natural Light for Bright, Inviting Photos
Lighting is one of the most critical elements in photography, and natural light is often the best option for capturing a space’s true essence. To maximize natural light in your home, start by opening all curtains and blinds to let in as much daylight as possible. Clean your windows inside and out to ensure they don’t diminish the quality of light entering the room.
If certain rooms don’t get enough natural light, consider adding supplementary lighting. Use lamps and strategically placed light fixtures to brighten up dark corners. However, avoid using overhead lights as they can cast unflattering shadows. Instead, opt for soft, diffused lighting that mimics natural light.
A well-lit home appears warm, inviting, and spacious in photos, making it more appealing to potential buyers or viewers.
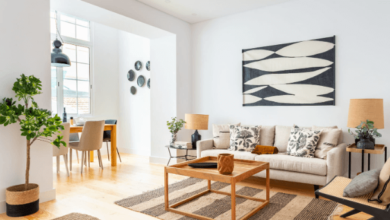
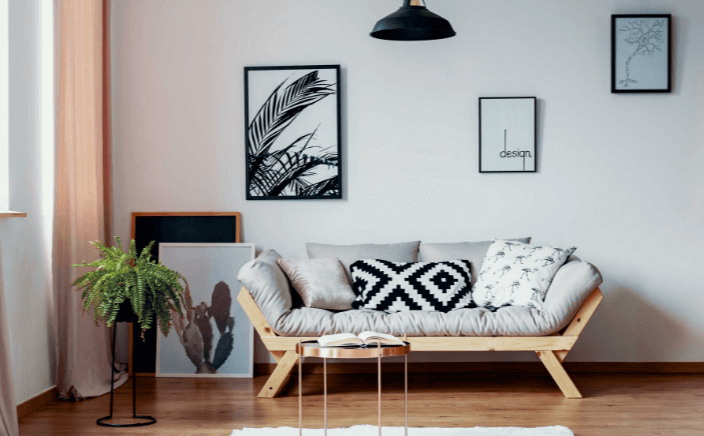
Staging Your Home: Creating a Picture-Perfect Scene
Staging is an art form that involves arranging furniture and décor to enhance the visual appeal of your home. The goal of staging is to highlight the best features of each room while downplaying any flaws. When staging your home for a photo shoot, think about balance, symmetry, and focal points.
In the living room, arrange furniture in a way that creates a cozy yet open space. Consider adding a few well-chosen accessories, such as a stylish throw blanket, decorative pillows, or a coffee table book to add a touch of elegance without cluttering the space.
Bedrooms should be serene and inviting. Make the bed with fresh, crisp linens, and add a few decorative cushions for a pop of color. Nightstands should be clear except for a lamp, a book, or a small plant.
In the dining room, set the table as if you were expecting guests. Use your best dishes, glassware, and a simple centerpiece to create a welcoming atmosphere. The key is to keep it simple but polished, avoiding overly elaborate setups that might distract from the room itself.
Focusing on Key Areas: Highlighting Your Home’s Best Features
When preparing your home for a photo shoot, it’s essential to focus on the areas that will make the most impact. While every room should look its best, some spaces are particularly important, especially in real estate photography.
The kitchen and living room are often the focal points of a home, so ensure these areas are spotless and well-staged. In the kitchen, consider updating or polishing hardware, arranging fresh flowers, and ensuring the countertops are free of clutter.
The master bedroom is another key area, as it’s where potential buyers will imagine themselves relaxing. Make sure it looks inviting and comfortable, with clean linens, fluffed pillows, and a tidy closet.
Bathrooms should be pristine, with neatly folded towels, polished fixtures, and a clutter-free counter. Consider adding a few spa-like touches, such as scented candles or a small vase of flowers, to enhance the room’s appeal.
If your home has any unique features, such as a fireplace, a beautiful view, or a charming patio, make sure these are highlighted. These elements can set your home apart from others and should be showcased prominently in the photos.
Curb Appeal: Making the Exterior Shine
While the interior of your home is important, the exterior is the first thing people will see, so it’s essential to make a good impression. Boost your home’s curb appeal by ensuring the front yard is well-maintained. Mow the lawn, trim the hedges, and clear any debris or clutter. If you have a porch, consider adding a few potted plants, a clean doormat, and a fresh coat of paint on the front door.
Clean any outdoor furniture, and arrange it in a welcoming way. If you have a pool or garden, make sure these areas are also clean and well-kept. The goal is to make the exterior as inviting as the interior, giving potential buyers or viewers a reason to want to see more.
Working with a Professional Photographer: Tips for Collaboration
If you’ve decided to hire a professional photographer, collaboration is key to getting the best results. Before the shoot, walk the photographer through your home, pointing out features you want to highlight. Discuss the mood and style you want the photos to convey, whether it’s cozy and warm or sleek and modern.
Trust the photographer’s expertise, but don’t be afraid to offer input. If there are specific angles or details you want captured, communicate this clearly. A good photographer will appreciate your vision and work with you to create stunning images that meet your expectations.
Additionally, be prepared to make adjustments during the shoot. The photographer may suggest moving furniture, adjusting lighting, or rearranging décor to get the perfect shot. Flexibility and collaboration will ensure the final photos are exactly what you envisioned.
Timing the Shoot: Choosing the Best Time for Photos
The time of day you choose for your photo shoot can significantly impact the final images. Natural light changes throughout the day, and different lighting conditions can create different moods.
For most homes, mid-morning or early afternoon is ideal, as the light is bright but not too harsh. This time of day usually offers a good balance of light without creating strong shadows. If your home has large windows or faces the east or west, consider the direction of the sunlight and plan your shoot accordingly.
In some cases, you might want to capture your home during the “golden hour,” which is the hour after sunrise or before sunset. This time offers soft, warm light that can create a beautiful, inviting glow in photos.
Final Walkthrough: Last-Minute Touches Before the Shoot
Before the photographer arrives, do a final walkthrough of your home. This is your chance to catch any last-minute details that might have been overlooked. Straighten cushions, fluff pillows, and ensure that everything is in its proper place.
Check for any items that may have been forgo
tten during the initial decluttering, such as remote controls, pet toys, or stray clothing. Make sure all lights are working and that there are no distracting elements in the frame.
A final walkthrough ensures that your home is in perfect condition, ready to be captured in its best light.
Common Mistakes to Avoid When Preparing Your Home
Even with the best intentions, it’s easy to make mistakes when preparing your home for a photo shoot. One common mistake is over-decorating. While it’s important to add some personality to your space, too many decorative items can clutter the frame and distract from the room’s features.
Another mistake is neglecting the exterior. The outside of your home is just as important as the inside, so make sure it’s clean, tidy, and welcoming.
Lastly, don’t forget about the little details. Things like crooked picture frames, wrinkled bed linens, or a dirty mirror can detract from the overall look of your home in photos. Attention to detail is key to ensuring your home looks flawless.